Getting Moss to Climb: The Practical Guide to a Wabi-Kusa Wall
Getting Moss to Climb: The Practical Guide to a Wabi-Kusa Wall
The first attempt at a moss wall above the waterline usually produces something that looks less like a cascading green cliff and more like a failed science experiment. A handful of Java moss, tied to a piece of driftwood with fishing line, sits there for weeks doing nothing obvious. Then it browns. Then it floats away. Then the whole project gets abandoned in favor of a regular submerged layout, which at least has the decency to grow where it’s told.
The mistake is thinking that moss, being moss, will simply cling to anything damp. It won’t. The interface between air and water, where a wabi-kusa wall is supposed to live, is a more demanding environment than fully submerged or fully terrestrial growing. The moss has to believe it belongs there.
What a Wabi-Kusa Wall Actually Is
The term “wabi-kusa” gets thrown around broadly, but in practical terms, a wall setup means creating a planted surface that transitions from submerged growth at the bottom to emersed growth above. The driftwood or hardscape rises out of the water, and moss—usually Java moss, flame moss, or weeping moss—is trained to follow it. The effect, when it works, is a seamless green slope from underwater into the open air.
It is not a paludarium. There is no terrestrial section with soil, no frogs, no misting system. The wall is simply driftwood that extends above the tank’s water level, with moss held in place long enough for it to anchor itself.
Choosing the Right Wood
Not every piece of driftwood is suitable for this. The wood needs a surface that moss can grip—textured bark, crevices, or at least rough grain. Smooth, water-worn pieces that look beautiful underwater are useless above it because the moss has nothing to latch onto.
Manzanita branches, with their irregular bark and branching patterns, are a common choice. Malaysian driftwood, with its dense grain and heavy texture, also works. The shape matters more than the species. What to look for:
– A branch that rises at an angle, not straight up. Vertical walls are harder to moss because gravity works against moisture distribution.
– At least one major fork or junction where moss can be tucked rather than wrapped.
– A base wide enough to sit securely in the substrate or be anchored to a rock.
The wood should be soaked before use—not just for the usual tannin-leaching reasons, but to test whether it floats. A piece that wants to bob up will destabilize the whole arrangement once the tank is filled.
Moss Species That Take to Air
The common assumption that any aquarium moss will grow above water is incorrect. Some species dry out too fast. Others refuse to transition from aquatic to emersed growth and simply die where the water stops.
Java moss (*Taxiphyllum barbieri*) remains the most reliable option. It adapts to emersed conditions more readily than most, especially if the transition is gradual. Flame moss (*Taxiphyllum* sp. ‘Flame’) has a more dramatic upward growth pattern that looks striking on a vertical surface but requires more consistent humidity. Weeping moss (*Vesicularia ferriei*) hangs downward, which can work well on the underside of a branch but is harder to train upward.
What consistently fails: Christmas moss in emersed conditions (it crisps), and any of the finer-leaved mosses like peacock moss or spiky moss, which need constant submersion to maintain structure.
The Mechanics of Attachment
Tying moss directly to driftwood with fishing line is the standard method, but the standard method has a low success rate because people use too much line and too little contact. The goal is not to strap the moss down like cargo. It is to press thin, even layers of moss against the wood surface with just enough tension to keep them from shifting.
The process that works:
1. Spread the moss into a thin sheet, no more than a few millimeters thick. Thick clumps will rot in the center where air cannot reach.
2. Lay it against the wood where growth is wanted.
3. Wrap with fishing line in a spiral pattern, not individual knots. The spiral applies even pressure.
4. Tuck the ends of the moss into cracks or behind small wood splinters if possible.
A paste of chopped moss and yogurt, sometimes recommended online, should be avoided. It works for vertical concrete walls in outdoor ponds but creates a slimy mess in an aquarium where water movement carries the paste away before the moss can establish.
Water Level and the Transition Zone
The setup is filled so that the water level reaches just below where the moss starts. This is where most people get it wrong. Filling the tank to the top submerges the moss entirely, defeating the purpose. Filling too low leaves the moss hanging in dry air with no capillary moisture reaching it.
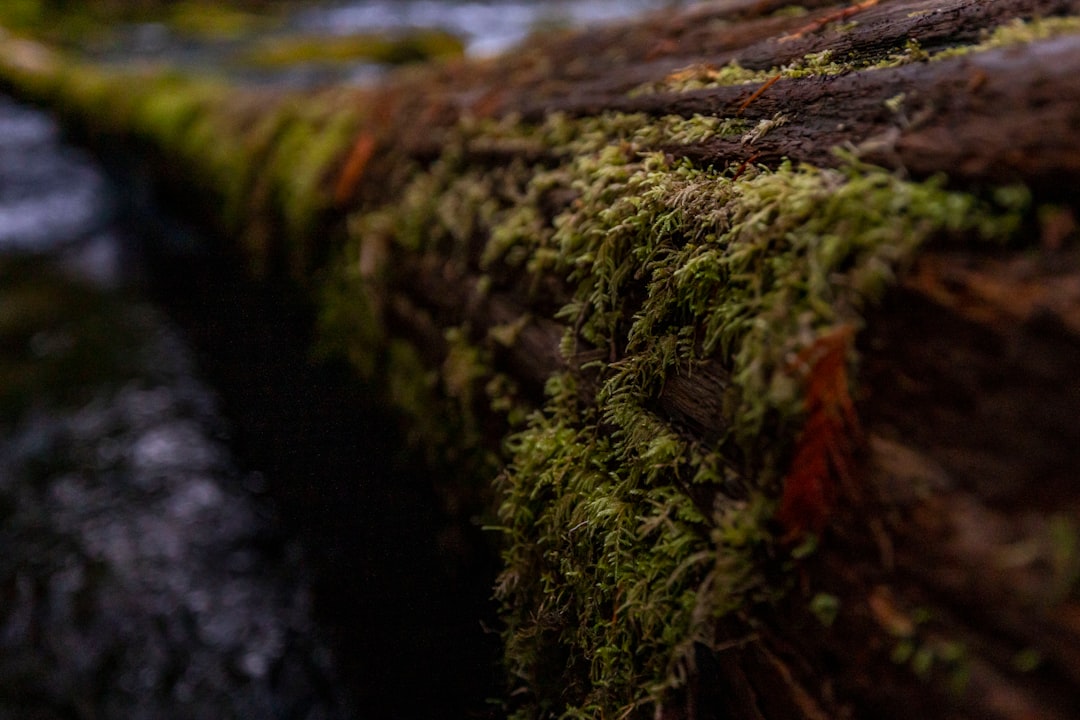
The water level should sit about an inch or two below the lowest point of the moss. The wood stays damp through capillary action—water wicks up through the grain, keeping the surface moist without being wet. This natural moisture gradient is what allows the moss to transition from aquatic to emersed growth gradually.
One tank, set up in a Singapore apartment with a piece of ghost wood, required a water level exactly 4.5 centimeters below the moss line. Any higher and the lower moss grew leggy and soft. Any lower and the upper tips began to brown within three days.
The exact distance depends on the wood’s porosity, the room’s humidity, and the moss species. The only way to find it is to watch and adjust.
Humidity and the First Weeks
For the first two to three weeks, the moss needs higher humidity than the room provides. This is usually done by covering part of the tank with plastic wrap or a glass lid, keeping moisture in while still allowing airflow.
The balance is finicky. Too much coverage and the moss develops mold. Too little and it dries out before it can anchor. The usual solution is to cover the top of the tank loosely, leaving a gap of about an inch along one side, and to mist the moss once daily with dechlorinated water.
One aquarist in Kuala Lumpur kept a digital hygrometer on the tank rim during this phase. The target range was 75 to 85 percent humidity. Below 70, the moss tips curled. Above 90, a white fungal growth appeared within two days.
After the third week, the plastic wrap can be removed gradually—an inch more each day—allowing the moss to acclimate to room humidity. By week four, the moss should be visibly holding to the wood on its own, with small new growth tips forming at the edges.
Lighting Considerations
Moss growing above water receives more intense light than its submerged counterpart because there is no water column to diffuse the light. This changes the requirements.
A standard aquarium light mounted above the tank works, but the moss on the highest part of the driftwood may receive too much intensity and begin to yellow. The fix is either to lower the light output or to position the light slightly forward so the highest branches are in slightly lower light.
The opposite problem—insufficient light on the lower, submerged parts of the moss—is equally common. The moss underwater needs enough PAR to photosynthesize, but the moss above water gets scorched if the light is strong enough. A light with adjustable intensity or a timer that ramps up and down can solve this. Without one, the compromise is to choose a light that suits the emersed portion and accept slower growth underwater.
Maintenance Above the Waterline
Once established, a wabi-kusa wall requires different maintenance from a submerged aquascape. The emersed moss will grow faster than the submerged portion because carbon dioxide is more available in air. Trimming is needed every two to three weeks.
The trimming is done with curved scissors, cutting from the outside inward to maintain the natural shape. Moss pulled off rather than cut will tear the attached portion, opening gaps that take weeks to fill.
Dust accumulates on emersed moss more than people expect. In a living room tank, a fine layer of household dust settles on the upper leaves within a week. A soft brush or a gentle misting with a spray bottle removes it. Blowing on the moss or using a fan accelerates drying and should be avoided.
The Long-Term Reality
A moss wall that looks perfect at month three may look unruly at month six. The moss grows thicker, the original lines blur, and the wood becomes less visible. Some aquascapers welcome this as the “aged” look. Others find themselves doing major resets every six to eight months, stripping the moss back to the wood and starting the training process again.
There is no permanent solution to this. Moss above water, given adequate humidity and light, will keep growing. The wall is not a finished piece. It is a continuous negotiation.
One tank in Bangkok had been running for fourteen months. The moss had climbed nearly thirty centimeters above the original placement point, following a branch that curved sideways. The owner had stopped trimming it three months earlier, letting the moss grow wild. The result was less structured but more convincing as a natural formation—a green cascade that looked like it had been there for years, not something trained by human hands.
The question, in the end, is whether the moss decides to cooperate.
📷 Photos: Leo_Visions (Unsplash), Martin Martz (Unsplash)